Layertree - Table of Content
The layertree diplays the layers, the service folders and from version 3.0.5 onwards also different layersets. The layertree allows you to activate/deactivate layers in the map. You can also activate/deactivate the info request for layers.
You can change the order of Services and layers via drag & drop.
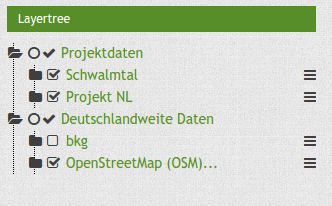
Starting with version 3.0.5 the layertree allows to display multiple layersets that are displayed as an additional structural level. The following screenshots shows an example:
Configuration
To use different layersets in your layertree, you have to adjust different elements. These are:
- creating different layersets,
- adjustments in the main map to display the layersets,
- the configuration of the layertree itself.
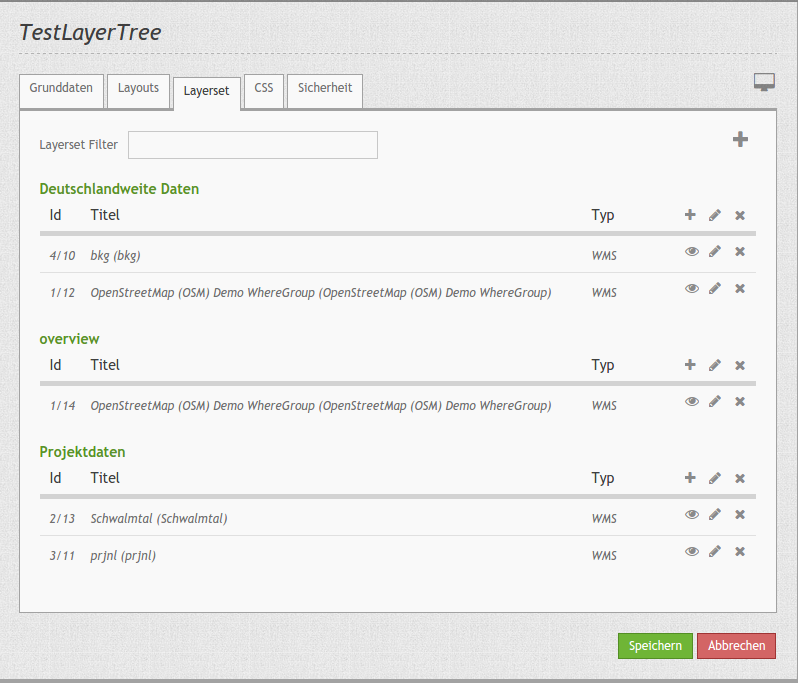
The following example defines two layersets each with to instances:
- Projektdaten (project data): with the instances “”Schwalmtal” and “”Projekt NL”.
- Deutschlandweite Daten (german wide data): with the instanaces “”bkg” and “”OpenStreetMap (OSM)”.
Configuration of the layersets
The layersets are defined - as usual - in the application under the tab “Layerset”. Instances are still references to the WMS services. This dialog allows you to define new layersets and add the instances. In this example, the third layerset “overview” is used - also as usual - for the overview map.
Configuration in the map element
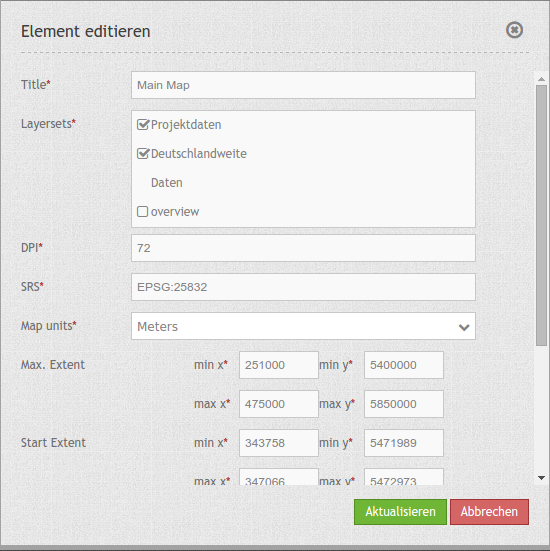
The second step is the configuration of the main map. You define here which layersets should be shown for the map display. The layerset “overview” for example should not be used for the main map. Here you can also define how the layersets should be ordered in the layertree and in the map. Therefore you can rearrange the order via drag & drop (project data above the german-wide data). Please mind that themes at the top might cover underlying themes.
Configuration of the layertree
The last step is the confguration of the layertree itself. The instances that you have specified in the main map are defined further.
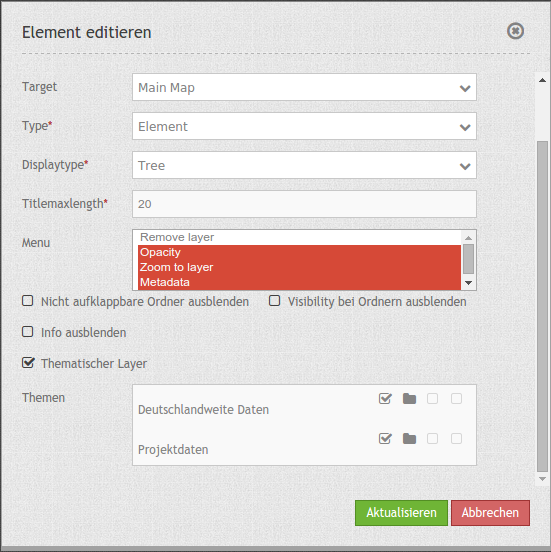
You can check different options:
- Hide not toggleable
- Hide visibility by folders
- Hide info
- Thematic Layers: If this option is switched off, the layertree does not use the configured layersets and shows all instances on the root level.
Further options are available if the “thematic layer” option is switched on. The following screenshots shows the four adjustments:

- (1) Theme show: If this option is set, the layerset is shown as an additional level. If this option is not set, the included layer-instances are shown at the root-level.
- (2) Theme opened: If this option is set (symbol of an opened folder) the theme is automatically opened in the layertree.
- (3) Theme: source visibility: If this option is set, the layertree displays the button “show sources”.
- (4) Theme: layer visibility: If this option is set, the layertree displays the button “show all layers”
These two additinoal buttons are shown in the following screenshot:
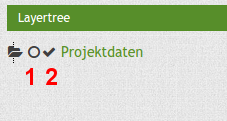
- (1) The button “show sources”: You can set all subsidiary services (instances) visible or set the state back to the pre-configured origin.
- (2) The button “Show all layers”: You can set all subsidiary services (instances) to visible.
YAML-Definition:
tbd: later # documentation will be handed in later. ;-)
Class, Widget & Style
- Class: Mapbender\CoreBundle\Element\Layertree
- Widget: mapbender.element.layertree.js
- Style: mapbender.elements.css
HTTP Callbacks
None.
JavaScript Signals
None.
